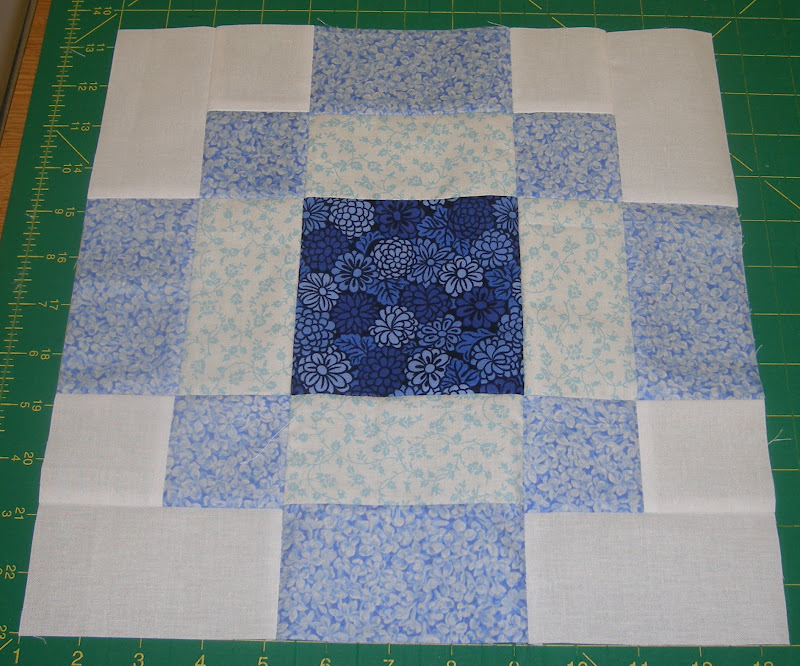
Sunday, 22 July 2012

In search of my inner wonk

I am on a quest to find my inner wonk.

You see, I have trouble with wonky.  Even when I try really hard to be wonky, I end up straight.  It must be how I'm wired.  My wonky house would have made any architect proud

I promise you, at one stage of construction this was really quite wonky,
but somehow just seemed to "correct" itself under my hands!


and my wonky stars, well they only just about wonked!


Anyway, these gorgeous fabrics arrived/have been collected at my house in the past fortnight for a very special quilt and to make it work I need to find my elusive inner wonk, fast!


This quilt will be for my brother and sister-in-law and I just don't think that a straight as a die, traditional block is really them.  So when I saw their newly decorated lounge in shades of grey with no accent colour present I knew that I wanted to do something like this but without the colour splashes.  I absolutely love Faith's take on this quilt and my preference would be to include the colours, but it will be right not to include them for this particular gift.

So, do I think I can find the ability to do wonky without straightening it out by some kind of natural quirky fluke that I seem to possess?

Wonky trial block.
I did a trial block and I'm sort of getting there but I really do have to fight to stop some kind of inner spirit-level from winning every time.  Thankfully if all goes to plan there are only 9 blocks to have to fight myself over!!


Saturday, 21 July 2012

Bee Afternoon

Today was our Bee Blessed afternoon - fabric, fun, friends and tales of firemen (leaving you guessing on that one...).

Evidence that we did do some work and not just spend all afternoon eating Janette's cheese, biscuits and fresh fruit platter and Marion's sweet treats -


Everybody hard at it.


Our lovely Ros has been working on a pair of Amy Butler quilts and today finished up the first one.  Isn't it fabulous?


The second one is going to be slightly different in the sashing and layout, but is equally gorgeous.  We'll try to remember to show you when it's ready.

 I was working on some more blocks for the next quilts.  Another Very Square Like Me Block


and a couple more Antique Tiles (I like this block design A LOT)


Fun afternoon and kept us all out of trouble!


Wednesday, 18 July 2012

Got the Wiggles


A short while ago, Emily put out a call for some help to gather Wiggly bags for her friend's local charity and children's hospital. I wanted to have a go at these little bags as I know that a few of us making a little contribution can suddenly make quite a difference somewhere, to someone.  And, besides they were quick and easy and fun to stitch up.

These simple little velcro pouches with tape ties are used for holding the hickman lines (catheter tubes inserted in the chest for the administration of chemotherapy and other medication) used in children's cancer care.  Emily has posted a Wiggly bag tutorial here.  If you fancy putting some of your scraps to good use why not drop Emily a wee comment on her post so she can send you the mailing address.


Tuesday, 17 July 2012

The Not So Gross Quilt

This is the 'Not So Gross Quilt' - like it?


I could have just called it 'Steps and Stairs' but since it's made up of 144 white strips and 144 patterned strips which are then made into 144 of pairs before becoming the 16 blocks that make up this little quilt, I thought I should add the word 'gross' in somewhere.  But, since it's quite a nice little quilt top and not actually gross at all, it is the 'Not So Gross Quilt'.

If you fancy a little quick quilt gratification for a 48" square top, here's the 'how to':

Cut 144 white strips 2.5" x 4.5"
and 144 patterned/coloured strips 2.5" x 4.5" - 9 strips of same fabric needed for each of the 16 blocks.  (I used 16 co-ordinating jelly roll strips for this quilt and was able to cut all 9 patterned strips for one block from each jelly roll strip.)


Pair each white strip with one patterned strip, chain piecing all 144 pairs along the 4.5" edge. (Watch out for your bobbin thread running out, I had happily stitched about 20 pairs after the bobbin emptied before I realised - doh!).


Press all seams towards the patterned fabric (this is a gross part).


Now collect each set of 9 squares into little piles and decide on the placement of your patterned fabrics for the main 16 blocks.  It is important to decide on these before you sew the block together as the quilt is actually constructed from two different blocks (block A and block B) and you won't 
necessarily be able to swap the block placement once they are made up, unless it's with another block of similar layout.  

(The eagle eyed among you will note that I fell foul of this myself and the layout above is not the layout of my final quilt - so be warned, I speak from experience, though my error was that I forgot that rows 2 and 4 would start with a B block, rather than an A block.  Yet again - doh!)


The next step is to lay out each of your blocks.  The layout for each block is shown in the pic above.


Lay out all eight block As and all eight block Bs in piles to make chain piecing simpler.


Now chain piece the blocks and make up just as you would for any standard nine patch block until all 16 blocks are finished.

Once your blocks are pieced, trim them square and lay them out alternating block A with block B (and remembering, unlike me, that the second and fourth rows start with block B). Finally, piece your blocks into rows and join into a quilt top that's not so gross after all!


Saturday, 14 July 2012

Brit Quilt Progress

I've had a big empty weekend so far.  No plans, no chores, no family - all is quiet around here.  Except in the sewing room of course.

With nothing specifically planned and no meals to prepare I have been stitching away to my little heart's content and making progress on my Brit Quilt Swap 3 Mini-Quilt.

Fabrics were chosen, strips were stitched, triangles were cut 'til my brain hurt figuring out which way to turn a 6" x 24" ruler for the easiest slice

Don't those little flowers look like fried eggs?

and hexies were arranged.


Somewhere about 30 mins in to pressing open about a hundred seams I had a brainwave and dropped the height of the ironing board and squeezed it in beside me.  Yes, I know, it can take a long time for the penny to drop with me some days!

Pretend all that clutter isn't really there.
Pressing the seams open isn't something I generally do unless a pattern particularly calls for it, but with these hexagons reducing the bulk in the centre joins really helped keep the momentum with the machine piecing.


With the top all together, I did something I rarely do and pieced a back for this little quilt.  I had some remaining triangles and joined them differently to make a centrepiece for the backing.


Then I pieced this into some white cotton and made the whole thing my quilt label (partner's name is hidden of course!).


See those pins poking up at the corners of the hexagon up there? They are how I tried to keep the back hexagon centred with the front hexagon.  The pins were inserted at the corners of the front centre hexie and then I positioned each corner of the back hexagon over the corresponding pin and voila!  It wasn't perfect, but pretty close.

I am rather impressed with myself for getting this far today.  I'll get the quilting done shortly and then I need to decide on binding.  It doesn't look very big but when I calculated the binding requirement it  is quite a bit more than I had imagined.  Dare I go scrappy with the fabrics already in here?


Thursday, 12 July 2012

All in an afternoon's work

Today was a bank holiday in Northern Ireland, so no work for me!  After a lazy morning catching up on google reader and general hopping around websites, we headed out as a family into the sunshine (yes, actual real sunshine!) to climb Slieve Croob which is not too far from where we live.

I promise there was sunshine in spite of all those clouds!

See the fabulous views from the top.
Those are the Mourne Mountains in the background.

I have never climbed Croob before and, usually preferring flat(ish) beach or woodland walks, felt that after all that exertion I had earned an afternoon in the sewing room.

I gathered six of the lovely Melissa Averinos Swoon fqs which I won from Mandy at Simply Solids in a giveaway last year


and "allowed" myself to be distracted from what I actually went up there to sew (will have to show you that another day). Instead, inspired by this quilt I had a go at the Yellow Brick Road pattern.

After some nifty cutting of 6 fat quarters


I had 20 blocks of three varying designs


and not long after, a little quilt top measuring 36.5" x 45.5"


It's very busy I'll admit, much busier than I would usually go for, but I think I kind of like it in a not-very-me sort of way.  Oddly, when I had the fabrics in their little fq bundle I had the impression that this quilt would turn out to be quite brown, but actually it's quite purple among the yellow and orange and green.

I've been playing with possibilities for borders but, not having any more of the Swoon it would have to be a solid and when I tested them, they look so empty compared with the business of the quilt.  My son suggested just keeping this quilt small and adding an orange binding and I think I might just follow his advice.

The Yellow Brick Road pattern was a great pattern to work with.  The cutting instructions are clever and there's very little wastage.  It probably works best when the fabrics are more contrasting than these ones, but it's got a slightly modern feel to it and it can be whipped up into a top in just a few hours.  I will definitely be trying this one again.


Related Posts Plugin for WordPress, Blogger...