Friday, 11 July 2014

HipBees - July 2014


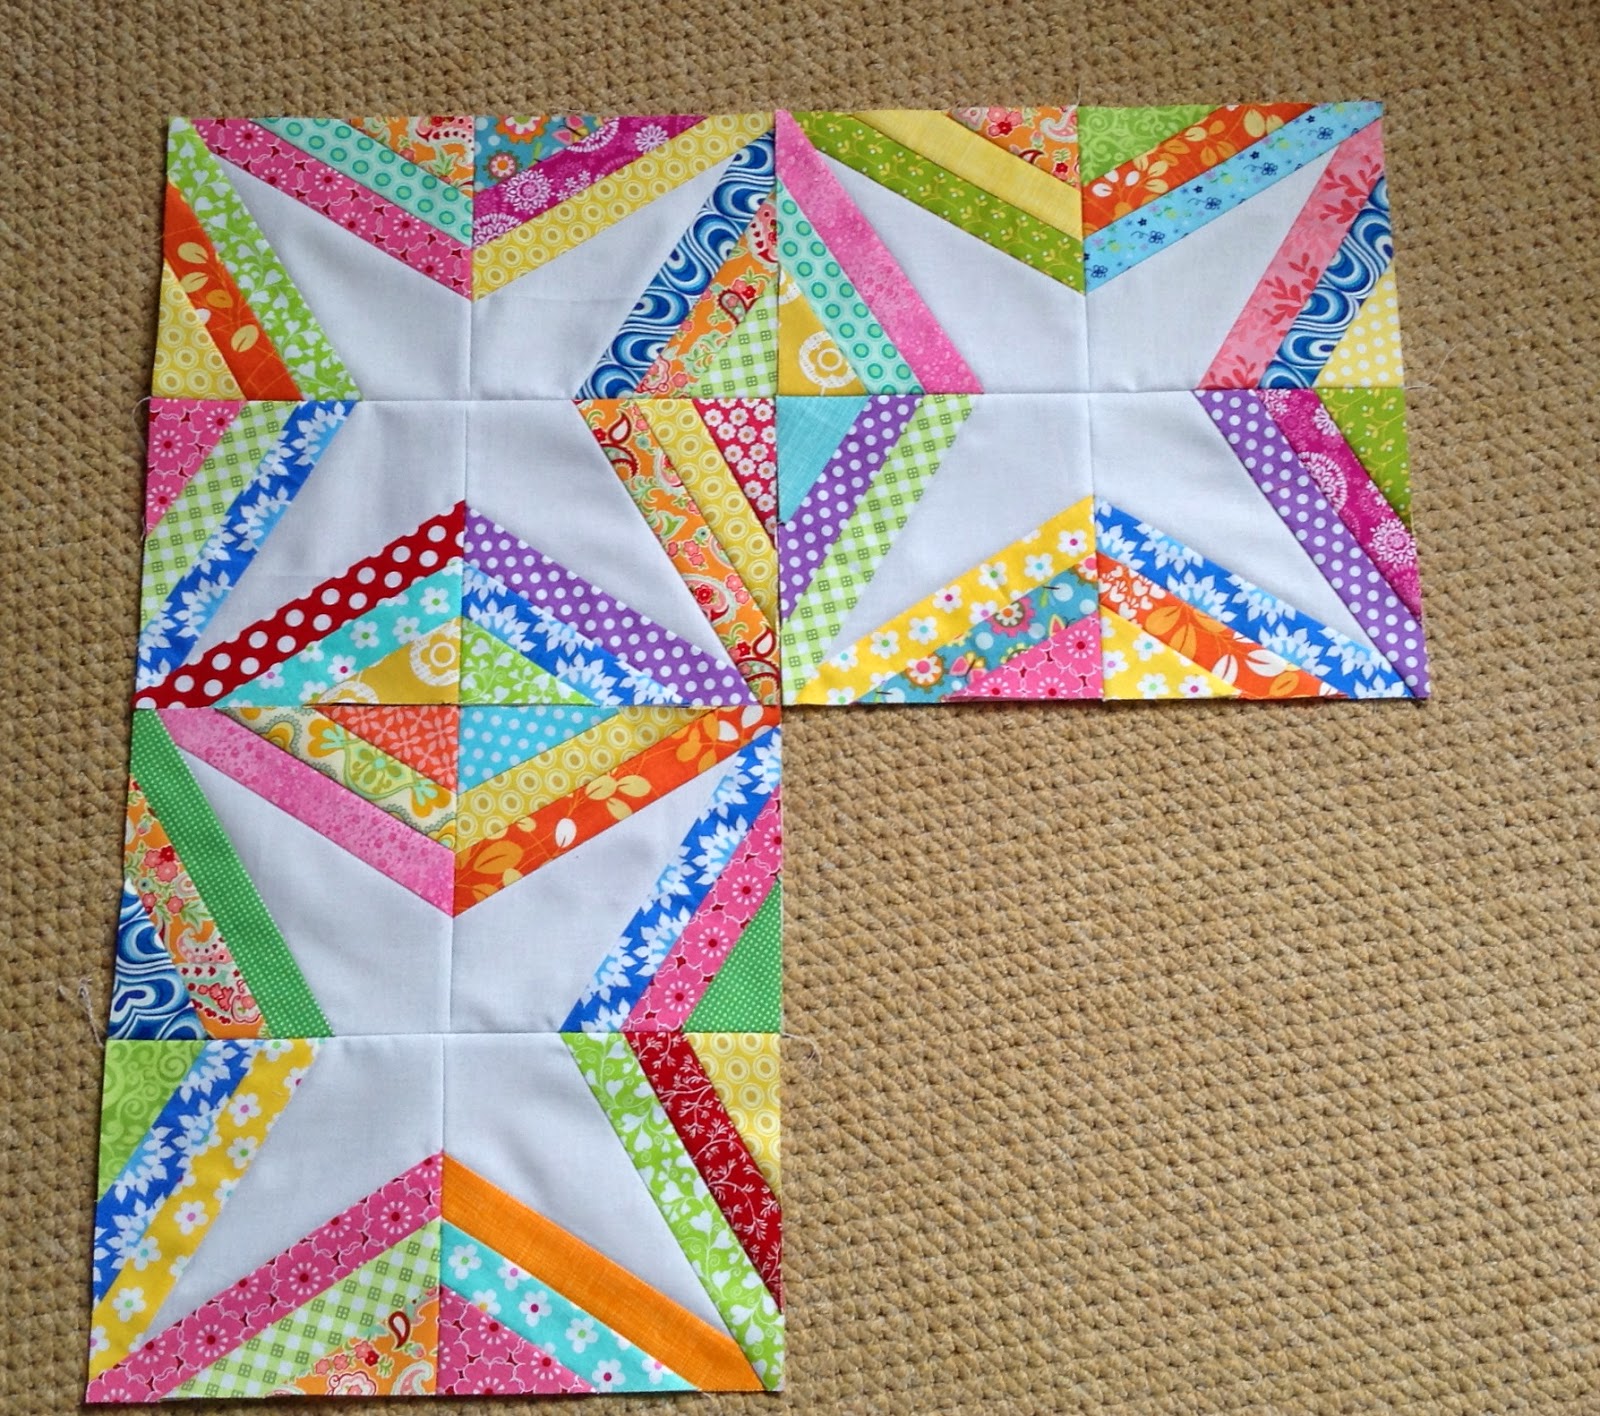
HipBees' July Queen Bee is the adventurous Indianna Dreams who requested these Scrappy Mini Star blocks using Cindy's handy tutorial.

Four blocks

In the interests of telling it like it is, these blocks are individually made up of 60 pieces each which is a lot of seams to tame to get the block to come in on size and FLAT.  A consistent seam allowance and your iron will be your friend for these babies.  I hope that Indianna Dreams will forgive my inconsistencies and that they will disappear into the quilt when it's all together.

The fabrics are mostly Lark, I think, and they really are effective in the scrappy deliciousness of these blocks.  The secondary pattern is much more obvious when you add more and more blocks together. This should be a scrappy sensation when it's finished.

Wednesday, 9 July 2014

The Case of the Misshapen Aeroplane Bag

It is so nice and sunny out today that it could be a "lashings of ginger beer" picnic and mystery solving opportunity for Enid Blyton's Famous Five or Secret Seven.  So, could they solve the mystery of my misshapen aeroplane bag?


See?  One side is pooching out the other is not.  Not sure how clued up Ms Blyton's juvenile sleuths are on zip fitting in bags, but my money is on the tapering zip!  Never mind, I think it looks pretty anyway!

I made the larger of the two bags in order to maximise what I might be able to carry with me on to a flight, instead of trying to cram everything (unsuccessfully) into a smaller handbag.


There's a ton of room in there and I'm really pleased with the overall size.

I used the Sew Sweetness pattern and some extra, helpful advice from a few friends.  All in all, the pattern was easy to follow and the bag came together well.  I love that I finally found a use for that Amy Butler Daisy Chain print.  I made it with about half an inch to spare on that one.  I think if you plan to give this bag a lot of use and abuse you would be best to make it in something a bit more robust than quilting cotton, but as I don't actually travel very often and intend that it will be carry on luggage only, I imagine it will survive well enough with the stabilisers and interfacings hidden in there.


Not so pretty zip end.

And another one

As I said, I am fairly certain the misshapen sides of the bag are due to my inability to interpret the zip tapering instructions.  I think this caused my problems with not being able to get my needle close enough to the area where the bag edges and lining edges met the zip ends.  I unpicked a few times but my puzzler couldn't work it out. Since it was most likely the tapering itself that was the issue, without understanding fully how that works I'm just repeating my problem.  The result is these funny, bulky "pleats" at my zip ends and a bit of a gap in the lining side of one of the ends too.

I gave it some thought and while one part of me wants to know how to put it right, the other part of me is happy to chalk it up to experience, try to resolve it if there is ever a next time, and just get on and stuff that bag full of necessaries for fun weekends away now and again!


I do believe this finish also constitutes a tick of my FAL Qtr 3 List already!!

Monday, 7 July 2014

FAL 2014: Qtr 3 Goals List


Finish Along 2014


Saying "Quarter 3" is making it sound like the year is moving way too fast, but here goes with my stitching finish goals for this quarter:


1 - Ruby Churn Dash bed quilt
Carrying over from my Qtr 2 list, this top needs to be quilted and bound and placed on my bed.  I am hatching a plan.


2 - Kaffe Fassett Sparkling Gemstones Quilt
Again carrying over from Quarter 2, these fabrics have been set aside for a Pam Lintott Sparkling Gemstones quilt pattern.  They have waited an awfully long time for some attention, perhaps they'll get lucky this quarter?!


3 - Aeroplane Bag
Rather letting the cat out of the aeroplane bag with my fabric selection here, but I've been keen to make a larger carry-on/weekender type bag for a while and settled on the Aeroplane bag pattern a month or so ago.  I have finally gathered all the requisite supplies and hope that this bag will feature heavily in my July sewing activity.  (For those of you hoping to see the orange zip, sorry!)


4 - Crocheted Rag Rug
I shall play hopeful here and add in the crocheted rag rug which I've been puzzling over. If the weather plays nice this would be an ideal project for sitting outdoors with.  As it's a scrappy project I have no idea if I even have enough fabric strip rolls to complete it yet, but maybe I will ...


So, that's it for Quarter 3.  Not a huge list I know, but I actually don't have many started projects that are eligible for listing and the couple of remaining UFOs are ones I really don't have plans for this quarter.  2 quilts, a rag rug and a bag - all do-able in a quarter, right?

Linking up with Katy at The Littlest Thistle.


Wednesday, 2 July 2014

FAL Quarter 2 2014: Round Up


Finish Along 2014


Katy has decreed that the time to admit to our successes with our Finish-a-long Quarter 2 Goals is upon us.  So let me review:

1 - Crazy Scrappy block quilt
16 of these cheery blocks and some navy fabric for sashing are tucked up in a box on the sewing room shelf. I think it's time to make something of them.  Yep, all finished - tick no 1.


Starter blocks
Fun finish!

2 - Mystery Medallion Quilt
Not quite such a Mystery now that the quilt top is finished, my medallion quilt is currently hanging on the back of the sewing room door.  If I can source one of those dual positioning quilting guide arms I would like perhaps to spiral quilt this one.  I would love to finish it this quarter.  A little quilting drama notwithstanding, I did it - eventually.  I LOVE this quilt, though I didn't spiral it as planned.


All pieced and waiting to become ...


this big TA DA!
3 - Ruby Churn Dash bed quilt
I think I have made about 33 of the 49 churn dashes that I need for this bed quilt, and I love them!  The remaining blocks are all cut and it would be good if I could finish this during the quarter so it can be in use when it becomes warm enough to sideline the duvet (she says optimistically). Hmmm... not a finish this quarter but I do now have a pieced quilt top.  At least it's progress.

I did progress from just some blocks ...
to all of the blocks pieced into rows.

4 - Kaffe Fassett Sparkling Gemstones Quilt
Left aside with a Pam Lintott Sparkling Gemstones quilt pattern in mind, this sadly neglected fabric deserves a little attention.  I think I could be pushing things hoping for a finish on this one in quarter 2, but sure you never know ....  Whispering very softly, this one is still in the box, still sadly neglected.


5 - Crocheted Ripple Throw
Been quite a long time since I started this crocheted throw back when I was in need of amusement during the many long hours a week I spent as a poolside mum.  Things changed and I haven't been poolside this year so the bag of crochet has been a little neglected.  It needs to be finished and since I only have that small amount of yarn remaining, I am hoping that Qtr 2 will see it rippled to a pretty finish. It won't be huge, probably just a lap sized throw.  Yay for another finish to declare!  My little throw is complete and draped over the back of my sofa, proving perfect as a shoulder wrap when the temperature drops a little late at night.


Not quite finished.


Wavy loveliness!

6 - Hunter's Star Cushion
I really need to switch out some older cushion covers from the lounge and I decided a while back to use the Hunter's star pattern for one of the replacements.  The fabrics are pulled and I've already cut some of the paper templates, so maybe one weekend I can turn on some tunes and make this a Qtr 2 success.

There was a lot more piecing in this that I realised.

But it was worth it.

I am going to call 4 out of 6 goals completed a respectable result for the quarter.  

I would so love to have finished the Ruby quilt so that it could have actually been put to use the past few weeks of warm nights, but in my defence I did have the quilting dramas of the Medallion to contend with.  I also managed the Retro Butterflies quilt from start to finish at class, as well as my windmill petals cushion and QAYG tote which weren't started at the beginning of the quarter so didn't qualify to be listed.  Add in a slew of blocks for my three bees and I'm happy with Sew Me productivity levels this quarter, even if they're not all FAL projects.

Got to say though that having a FAL goals list each of these two quarters is really helping my WIPs an UFOs to be brought under control.  A little accountability seems to work well for me.  Thanks for keeping us all at it Katy!

Linking up with Katy at The Littlest Thistle.


Tuesday, 1 July 2014

July Queen Bee - Modern Stitching Bee


This month is my month to be Queen Bee for the Modern Stitching Bees and this block, or should I say "that block" is my choice for the Bees to get busy with.


Some months ago, I came across "That Block"  (yes, that's what it's called) and I haven't been able to get it out of my head.  Mary from Molly Flanders Makerie has written a great tutorial for the block and has kindly allowed me to reference it for the purposes of the Bee this month.  (MS Bees please note that I am upscaling the block a little as Mary's will produce a 10.5" block.  I will list all adjusted measurements on the flickr discussion thread.)

Sort of similar to the Spider's Web block, it builds layers of strips around a central star shape (generally pieced in a solid).  However, using the quarter square unit as the base, rather than the quarter triangle a la Spider's Web, sets the star off-point and results in a different secondary pattern when the blocks are repeated.


I think it's this secondary diamond pattern that makes me have a personal preference for this block.  I love it and can't wait to see even more of them all laid out and repeating!   So what better way to get a deliciously summery scrappy quilt of "That blocks" than to farm out the work to the beautiful bees of your hive?!

So, ladies, I hope you won't hate me for the strippy piecing but this is what I would really love from you for July.  All of the specific details, adjusted measurements and handy hints from my experience of making up the blocks are posted on the flickr thread in our group.  Any other questions, just shout!

Thank you in advance for making these up for me.  Mwah!


Friday, 27 June 2014

Seriously excited!

Just couldn't wait to show you my churn dashes all stitched together.

Squee!

All my Ruby fabrics mixed with some Marmalade and Vintage Modern. Love it SO much!


Wednesday, 25 June 2014

Crocheted Rag Rug - Beginning of a journey


You may recall that back at the end of August I posted my fabric scrap rolls which I said were destined to become a crocheted rag rug just because I've always fancied having a go at one really, and it would use up those skinny strips I otherwise don't have a scrappy purpose for.

I would really like my rug to be oval (or probably more correctly a rectangle with rounded ends) but it is surprisingly difficult to track down a tutorial for one online.  The one I did find started out well -


I posted my late night pic on IG and had lots of kind admirers.  I think the random scrappiness of the fabrics caught folks' attention.  Then about 2 rounds later none of the counting seemed to be right, the increases for the rounded end were coming in the middle of the straight side and I just didn't know where I'd gone wrong.  I took a few rounds out and was meticulous this time but same issue repeated.  Clearly this pattern and I were having communication issues.


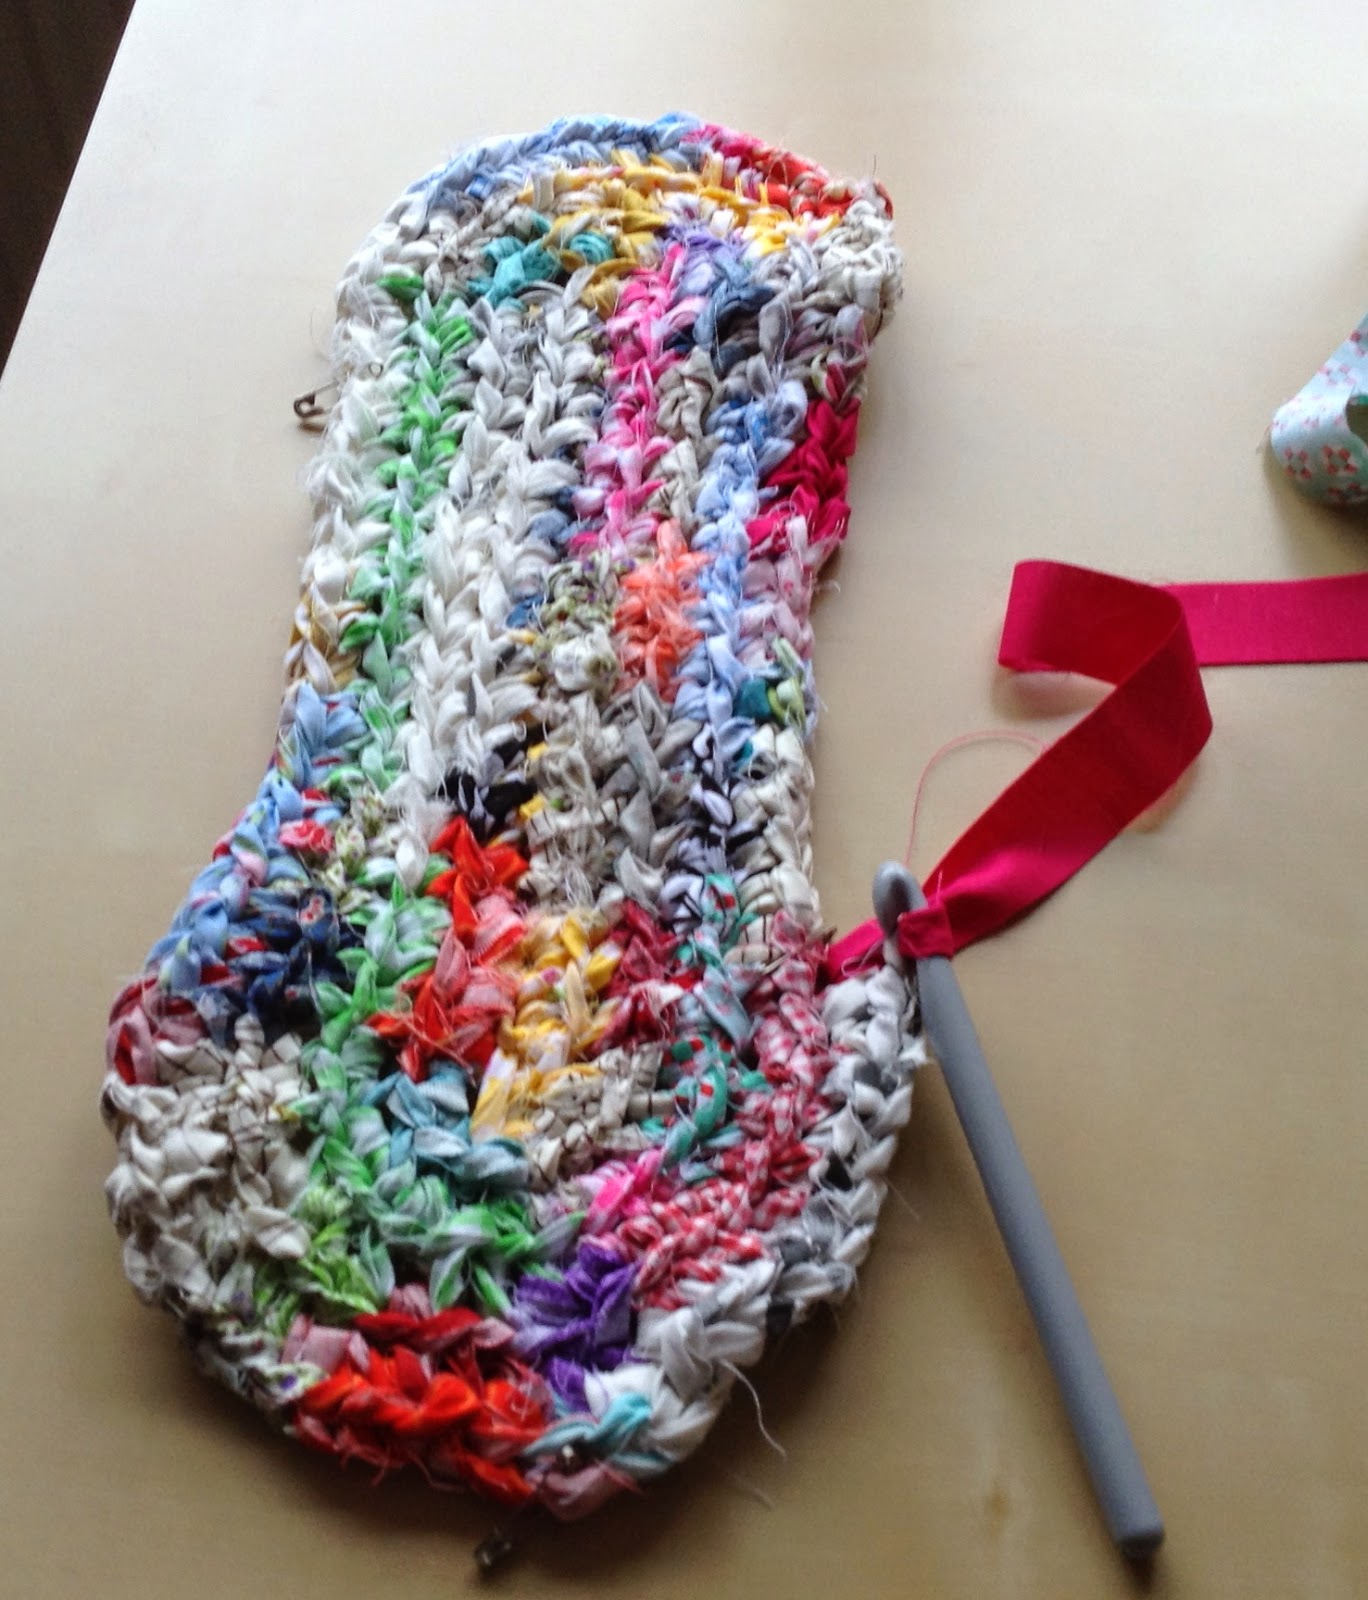
So, I ripped it back and tried another pattern for oval crochet and ended up with this wavy thing.  A little online research suggested that the waviness was due to too many increases for the curved ends, so continuing with this pattern was only going to compound the problem round by round.  Needed a different approach, so I left this one aside and picked up a new fabric roll.


Attempt no 3 is looking much better!  Basically, I am now working it out as I go along.  I've been a diligent little bunny and am painstakingly applying the principles I noticed in the original patterns to my own counting and it seems to be working so far.  I've used basting pins to mark the beginnings of the each curved section and each straight section (helps a lot with all the counting involved) and a basting pin with wool tail over there in the curved pink gingham end to help me identify the slip stitch at the end of each row which I am NOT supposed to work into (but did several times).  I seem to be getting there, though oval crochet advice hereforward suggests I need to start randomising the placement of the increase around the curved ends to avoid a half hexagon look.  Not sure how good I'll be at "randomising" but I'll give it a go in the name of crocheted rag rug happiness!!


I've had a few questions about my fabric rolls on IG, so thought I'd just quickly recap here.  My strips are all 1" wide lengths of leftovers that were too small for any other scrappy purpose.  From my reading I know folks have used strips as small as 0.5" wide too.  Not sure how wide they've gone but I wouldn't really like to be much wider than the 1" myself.


Making up the rolls is fairly mindless.  I simply stitched the strips together with a straight 0.25" seam allowance.  My advice is just to make sure you backstitch the whole 1" seam for a little security when working the crochet stitches.

Initially, I did try joining them at an angle like you do with binding, but this rug isn't a precision thing, so straight seams aren't going to be an issue, and they're much quicker than the angled ones!   When I'm coming to the end of a roll while crocheting, I can just stitch the end of the last strip to the starter strip of a new roll (unless I want to join as you would normal yarn and bury the tail ends as I go).  Not much to it all really.

Back in April I had a whole bin full of 1" strips to work through which suited that time but I wouldn't necessarily want to face them in this marathon way again.  If I trim the strips to 1" as I am tidying away other projects and sew them together a few every now and then my rolls could gather gradually.


So, there you have it, the beginning of my rag rug adventure.  Wish me well with the continuation of the pattern, I REALLY want this to work.

Related Posts Plugin for WordPress, Blogger...