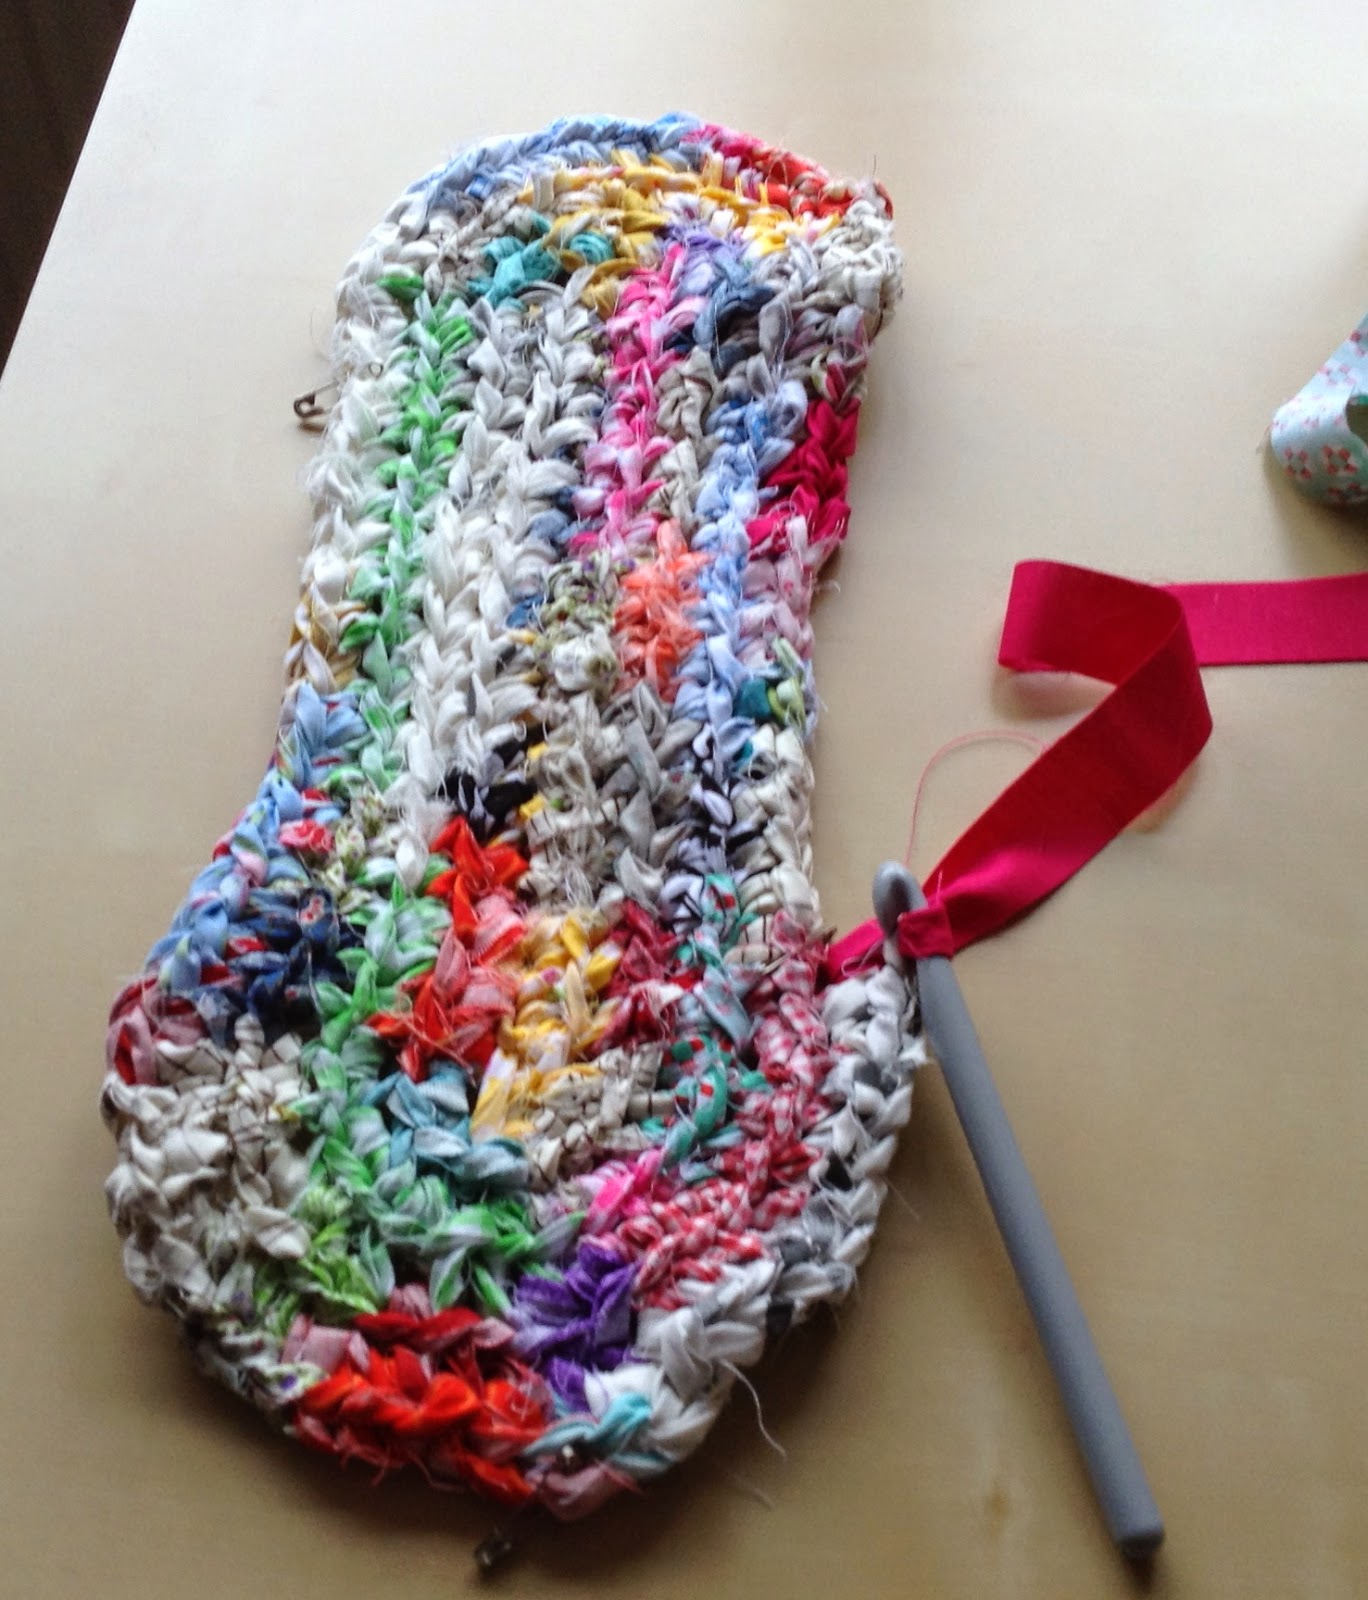
I did it! I managed to figure my way through the maths of creating an oval(ish) crocheted rag rug and I now have a finished rug and a FAL Qtr 3 list result!
Being totally honest this is my first ever attempt at drafting a pattern and I'm sure it isn't perfect. More experienced crocheters and pattern writers will no doubt spot flaws but, if you could live with your rug being the shape that mine is above then perhaps you can try the pattern at the bottom of this post for yourself.
Before you get to the pattern, here are some hints and tips from my experience:
1. Brace your fingers - this is a bit industrial!
2. Using safety pins to mark the slip stitch at the end of the round and to mark the beginnings of each curved section and each straight section is very helpful for all the counting involved and makes it easier to spot early if something has gone wrong. Pic to illustrate is on this post.
3. I used 1" cotton fabric scrap strips for this project. Again, this post explains briefly how I stitched them into rolls.
4. This rug is fantastic for using up leftovers from other projects or for recycling cotton or polycotton items you might be finished with. I used poplins (these were good because they frayed less than others), quilting cotton scraps, klona cotton (which was heavier and a little harder to work with but still possible), old duvet cover and pillowcase remnants, those offcuts from quilt backings like Ikea Nummers which are too small to be useful because of the large scale of the pattern, lighter weight fqs which I ordered before realising they weren't such great quality and a few ugly fabrics that I knew I would never use in anything else (remember, in strips and crocheted in you cannot tell they were once uglies).
5. I discovered that working with my 1" strips and 10mm hook each round grew the size of the rug by approx 1" width and height.
6. While I didn't measure how much fabric I was using (because I simply went to my scrap bins to make these rolls) I worked out that 1 dc used approx 6" length of fabric.

7. Throughout the process my rug was occasionally wavy in the middle (not at the edges where it indicates a problem with the increases). All it needed was a gentle stretch to flatten it all out each round.
8. It is a bit messy as all those strips tend to shed fluff and fibres as you work with them.
9. Although rag rugs aren't particularly something I love, I had a creative itch to scratch just to see if I could make one. I'm so glad I did. I had fun making it and I do quite like this wee scrappy rug even if I won't be decorating my whole house with them!
10. The finished rug is 34" x 24" which, for those of you who are quilters, is approx the size of a large cutting mat. It would make a great bath mat size too.
Ok, so on to what you came for:
Oval Crocheted Rag Rug - Pattern
Fabric strips 1” wide
10mm crochet hook
 |
| Work dc into the back loop only of the dc from prev round. |
NB - For this rug I made all of my double
crochet (dc) stitches into the back loop of the previous row, not through both
loop of the prev stitch. (See pic above.)
UK terms
ch = chain
dc = double crochet (US equiv = single crochet)
sl st = slip stitch
Ch 17.
(You
could adjust this number of chains to elongate the rug.
If you do, you will end up with 2 less dc stitches than the no of ch you make
and you will have to adjust the number in blue in the pattern for every round to your number
of stitches.)
Round
1
dc into 2nd ch from hook, 1 dc
in back loop only of next 15 ch, 3dc in last
ch; continue along the other side of the foundation chain (so that you are
working in a round) working 1 dc in the remaining loop of each of the next 15 ch, 2 dc in the first ch of this round, join with
a sl st to first ch. (Your curved ends will now have 3 sts each.)
 |
| Adding the safety pin marker in the sl st is a good indicator of the beginning of each round and a reminder NOT to work into the sl st. |
(I
found it easier to mark this slip stitch with a safety pin and yarn after
making it, as you do not want to work into it in any of the next rounds. Move the safety pin up to mark the slip
stitch made at the end of every round as you progress. It also helpfully
identifies the starting point of the rounds as you go along.)
Round
2
Ch1, 1 dc into same place as sl st, 1 dc in
next 15 dc, 2dc in each of the next 3 dc, 1 dc
in next 15 dc, 2 dc in each of next 2 dc, join
with sl st to first ch. (Your curved ends
will now have 6 sts each.)
Round
3
Ch1, 1 dc into same place as sl st, 1 dc in
next dc, 1 dc in next 15 dc, (2dc in next dc, 1
dc in next dc) 3 times, 1 dc in next 15 dc,
(2dc in next dc, 1 dc in next dc) twice, join with sl st to first ch. (Your curved ends will now have 9 sts each.)
Round
4
Ch1, 1 dc into same place as sl st, 1 dc in
each of next 2 dc, 1 dc in next 15 dc, (2dc in
next dc, 1 dc in next 2 dc) 3 times, 1 dc in next 15
dc, (2dc in next dc, 1 dc in next 2 dc) twice, join with sl st to first ch. (Your curved ends will now have 12 sts
each.)
Round
5
Ch1, 1 dc into same place as sl st, 1 dc in
each of next 3 dc, 1 dc in next 15 dc, (2dc in
next dc, 1 dc in next 3 dc) 3 times, 1 dc in next 15
dc, (2dc in next dc, 1 dc in next 3 dc) twice, join with sl st to first ch. (Your curved ends will now have 15 sts
each.)
Round
6
Ch1, 1 dc next dc, 2 dc in next dc, 1 dc in
next 2 dc, 1 dc in next 15 dc, (1dc in next 2
dc, 2dc in next dc, 1 dc in next 2 dc) 3
times, 1 dc in next 15 dc, (1dc in next 2
dc, 2dc in next dc, 1 dc in next 2 dc)
twice, join with sl st to first ch. (Your
curved ends will now have 18 sts each.)
Round
7
Ch1, 1 dc next 2 dc, 2 dc in next dc, 1 dc
in next 2 dc, 1 dc in next 15 dc, (1dc in next
3 dc, 2dc in next dc, 1 dc in next 2 dc)
3 times, 1 dc in next 15 dc, (1dc in next 3
dc, 2dc in next dc, 1 dc in next 2 dc)
twice, join with sl st to first ch. (Your
curved ends will now have 21 sts each.)
Round
8
Ch1, 1 dc next dc, 2 dc in next dc, 1 dc in
next 4 dc, 1 dc in next 15 dc, (1dc in next 2
dc, 2dc in next dc, 1 dc in next 4 dc) 3
times, 1 dc in next 15 dc, (1dc in next 2
dc, 2dc in next dc, 1 dc in next 4
dc) twice, join with sl st to first ch. (Your curved ends will now have 24 sts
each.)
Round
9
Ch1, 1 dc next 3 dc, 2 dc in next dc, 1 dc
in next 3 dc, 1 dc in next 15 dc, (1dc in next
4 dc, 2dc in next dc, 1 dc in next 3 dc)
3 times, 1 dc in next 15 dc, (1dc in next 4
dc, 2dc in next dc, 1 dc in next 3 dc) twice, join with sl st to first ch. (Your curved ends will now have 27 sts
each.)
Round
10
Ch1, 1 dc next 5 dc, 2 dc in next dc, 1 dc
in next 2 dc, 1 dc in next 15 dc, (1dc in next
6 dc, 2dc in next dc, 1 dc in next 2 dc)
3 times, 1 dc in next 15 dc, (1dc in next 6
dc, 2dc in next dc, 1 dc in next 2
dc) twice, join with sl st to first ch. (Your curved ends will now have 30 sts
each.)
Round
11
Ch1, 1 dc next 2 dc, 2 dc in next dc, 1 dc
in next 6 dc, 1 dc in next 15 dc, (1dc in next 3
dc, 2dc in next dc, 1 dc in next 6 dc) 3
times, 1 dc in next 15 dc, (1dc in next 3
dc, 2dc in next dc, 1 dc in next 6
dc) twice, join with sl st to first ch. (Your curved ends will now have 33 sts
each.)
Round
12
Ch1, 1 dc next 4 dc, 2 dc in next dc, 1 dc
in next 5 dc, 1 dc in next 15 dc, (1dc in next
5 dc, 2dc in next dc, 1 dc in next 5 dc)
3 times, 1 dc in next 15 dc, (1dc in next 5
dc, 2dc in next dc, 1 dc in next 5
dc) twice, join with sl st to first ch. (Your curved ends will now have 36 sts
each.)
Round
13
Ch1, 1 dc next 6 dc, 2 dc in next dc, 1 dc
in next 4 dc, 1 dc in next 15 dc, (1dc in next 7
dc, 2dc in next dc, 1 dc in next 4 dc) 3
times, 1 dc in next 15 dc, (1dc in next 7
dc, 2dc in next dc, 1 dc in next 4
dc) twice, join with sl st to first ch. (Your curved ends will now have 39 sts
each.)
Round
14
Ch1, 1 dc next 2 dc, 2 dc in next dc, 1 dc
in next 9 dc, 1 dc in next 15 dc, (1dc in next
3 dc, 2dc in next dc, 1 dc in next 9 dc)
3 times, 1 dc in next 15 dc, (1dc in next 3
dc, 2dc in next dc, 1 dc in next 9
dc) twice, join with sl st to first ch. (Your curved ends will now have 42 sts
each.)
Round
15
Ch1, 1 dc next 8 dc, 2 dc in next dc, 1 dc
in next 4 dc, 1 dc in next 15 dc, (1dc in next 9
dc, 2dc in next dc, 1 dc in next 4 dc) 3
times, 1 dc in next 15 dc, (1dc in next 9
dc, 2dc in next dc, 1 dc in next 4
dc) twice, join with sl st to first ch. (Your curved ends will now have 45 sts
each.)
Round
16
Ch1, 1 dc next 6 dc, 2 dc in next dc, 1 dc
in next 7 dc, 1 dc in next 15 dc, (1dc in next
7 dc, 2dc in next dc, 1 dc in next 7 dc)
3 times, 1 dc in next 15 dc, (1dc in next 7
dc, 2dc in next dc, 1 dc in next 7
dc) twice, join with sl st to first ch. (Your curved ends will now have 48 sts
each.)
Round
17
Ch1, 1 dc next 9 dc, 2 dc in next dc, 1 dc
in next 5 dc, 1 dc in next 15 dc, (1dc in next 10
dc, 2dc in next dc, 1 dc in next 5 dc) 3
times, 1 dc in next 15 dc, (1dc in next 10
dc, 2dc in next dc, 1 dc in next 5
dc) twice, join with sl st to first ch. (Your curved ends will now have 51 sts
each.)
Round
18
Ch1, 1 dc next 3 dc, 2 dc in next dc, 1 dc
in next 12 dc, 1 dc in next 15 dc, (1dc in next
4 dc, 2dc in next dc, 1 dc in next 12
dc) 3 times, 1 dc in next 15 dc, (1dc in next 4
dc, 2dc in next dc, 1 dc in next 12
dc) twice, join with sl st to first ch. (Your curved ends will now have 54 sts
each.)
Round
19
Ch1, 1 dc next 9 dc, 2 dc in next dc, 1 dc
in next 7 dc, 1 dc in next 15 dc, (1dc in next 10
dc, 2dc in next dc, 1 dc in next 7 dc) 3
times, 1 dc in next 15 dc, (1dc in next 10 dc, 2dc in next dc, 1 dc in next 7 dc) twice, join with sl st to first ch. (Your curved ends will now have 57 sts
each.)
Round
20
Ch1, 1 dc next 4 dc, 2 dc in next dc, 1 dc
in next 13 dc, 1 dc in next 15 dc, (1dc in next
5 dc, 2dc in next dc, 1 dc in next 13
dc) 3 times, 1 dc in next 15 dc, (1dc in next 5
dc, 2dc in next dc, 1 dc in next 13
dc) twice, join with sl st to first ch. (Your curved ends will now have 60 sts
each.)
Round
21
Ch1, 1 dc next 11 dc, 2 dc in next dc, 1 dc
in next 7 dc, 1 dc in next 15 dc, (1dc in next 12
dc, 2dc in next dc, 1 dc in next 7 dc) 3
times, 1 dc in next 15 dc, (1dc in next 12
dc, 2dc in next dc, 1 dc in next 7
dc) twice, join with sl st to first ch. (Your curved ends will now have 63 sts
each.)
Round
22
Ch1, 1 dc next 7 dc, 2 dc in next dc, 1 dc
in next 12 dc, 1 dc in next 15 dc, (1dc in next
8 dc, 2dc in next dc, 1 dc in next 12
dc) 3 times, 1 dc in next 15 dc, (1dc in next 8
dc, 2dc in next dc, 1 dc in next 12
dc) twice, join with sl st to first ch. (Your curved ends will now have 66 sts
each.)
Fasten off. Stretch out your rug and admire.

If you are keen to try a rug for yourself, I hope that this pattern will work out for you.