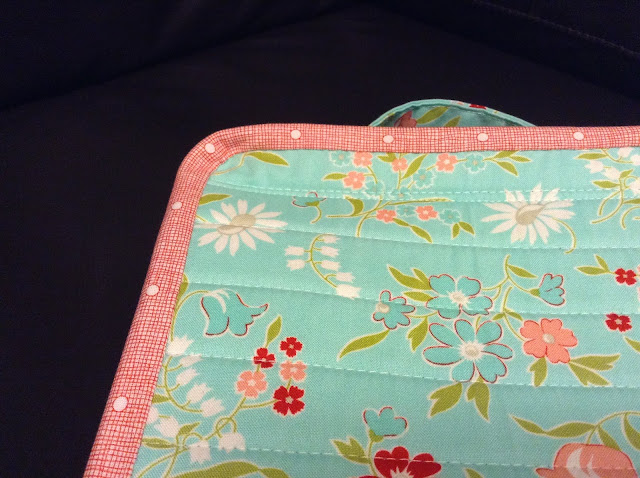
Thursday 25 July 2019

Cord Keeper Tutorial


I have been meaning to make some cord keepers for my sewing machine power cords and foot pedal cords for ages.  Frustrated by elastic bands that dry out and no longer have any elasticity, I thought it was about time I hunted out a few scraps and got to it.

These are super quick little makes if you have some scraps of fabric and interfacing (or wadding to hand).  The longest parts for me were hunting out supplies from my not so easily accessible boxes and deliberating over what size I wanted them to be.  There are other tutorials around but the sizes of the keeper vary quite a bit, so I wasn't sure how big to go (or not).

In the end my little keepers measure about 2.5" x 5.5" and they're a pretty good fit for the bulk of the cords.  There's just one that I could, perhaps, add a second kam snap fitting to to tighten it up a little.

I thought I'd share a few pics of how I did it, in case you'd like to tidy up your own machine cords.


1.  Instead of using interfacing, I wanted to quilt the outer of my keeper, so I started with a 3.5" x 6.5" rectangle of outer fabric and wadding to quilt up.  Once I'd quilted it, I cut it down to 3" x 6".  I cut lining fabric at 3" x 6" also, and marked rounded ends in pencil using the cardboard template I cut at 3" wide and rounded of using the plastic lid you can see.  (If you just want to use interfacing, cut everything at 3" x 6".)


2. I put the lining fabric face down on top of my quilted outer and pinned.  (I made four keepers as you can see in the photo).  Stitch a quarter of an inch seam around all four sides, leaving a small opening in the side for turning through.


3.  Trim off and snip little notches in the curved ends to help with the turn through.


 4.  Turn through and press well. The top stitch about ⅛" around all sides overlapping your beginning and ending stitches to secure.


 5.  You could stitch velcro on for the closures, but I liked the excuse to break out my kam snaps tool. I just positioned the snaps in the centre of the rounded ends and after a little muscle power they were done.  Just pay attention to the positioning of your cam snap pieces so that they meet where you want them to.


And, hey presto, four pretty cord keepers!


Just the job!


Monday 22 July 2019

Chunky Cut Quilt - stash busting bonanza!


I recently had a request to post the sizes of the blocks for my Chunky Cut Christmas Quilt.  (Marilyn, I'm sorry I have been unable to respond to you personally, but you are a no-reply blogger.)

This quilt is quick and fun and a great way to bust some stash if you are feeling you need to liberate fabric from your shelves.  It would be so good in many different fabrics, I think, so if you make one, be sure to share.


I'm sorry I don't have time to fancy up my quilt sketch before publishing here.  I did consider it, but it will be a long time before I find time to do that, so I hope the sketch is legible on your screen and that it all makes sense to you.  I constructed the block in sections A to I (indicated by the bolder lines on the larger diagram) and joined them into three rows to complete.  The sizes on the diagram are finished block sizes, so remember to add a half inch to each measurement to allow for your quarter inch seams.  The seam allowances are included on the cutting list below for you.  

Section A
Cut 1:  15 ½" x 6 ½"
Cut 1:  6 ½" x 12 ½"
Cut 1:  9 ½" x 12 ½"

Section B
Cut 2:  9 ½" squares
Cut 1:  9 ½" x 18 ½"

Section C
Cut 2:  15 ½" x 9 ½"
Cut 2:  9 ½" squares

Section D
Cut 2:  9 ½" squares
Cut 1:  12 ½" x 9 ½"
Cut 1:  12 ½" x 15 ½"
Cut 1:  9 ½" x 6 ½"

Section E
Cut 1:  9 ½" x 15 ½"
Cut 1:  9 ½" x 6 ½"
Cut 1:  6 ½" x 9 ½"
Cut 1:  9 ½" square
Cut 1:  12 ½" x 9 ½"

Section F
Cut 1:  12 ½" x 9 ½"
Cut 1:  9 ½" x 15 ½"
Cut 1:  9 ½" square
Cut 1:  6 ½" x 9 ½"
Cut 1:  9 ½" x 6 ½"

Section G
Cut 1:  6 ½" x 15 ½"
Cut 1:  12 ½" x 6 ½"
Cut 1:  12 ½" x 9 ½"
Cut 1:  18 ½" x 9 ½"

Section H
Cut 1:  15 ½" x 12 ½"
Cut 1:  6 ½" x 12 ½"
Cut 1:  9 ½" x 12 ½"
Cut 1:  9 ½" square
Cut 1:  9 ½" x 15 ½"

Section I
Cut 1:  9 ½" x 12 ½"
Cut 1:  6 ½" x 12 ½"
Cut 1:  15 ½" x 12 ½"

Binding 
You will need 15" FWOF for binding
246" of binding is required
Cut 6 strips 2.5" x FWOF

Backing
I used a brushed cotton sheet for my backing so I didn't calculate actual yardage but the quilt will measure 57 ½" x 66 ½" finished, so you will need backing to cover this size.  I think 3m/3yds should cover it but please check as I didn't calculate this for my own sewing purposes.

I hope this is helpful to you Marilyn, and maybe others will also enjoy breaking out some long held fabrics for a fun scrap buster!

Happy stitching!!

Monday 15 July 2019

Spelling Bee Quilt - progress 2

 I have a little more progress in my Spelling Bee block making to share.


C and D are the final letters of the quilt's first row.  It is fun to piece together the paired fabrics I chose for the lettering on this quilt.  Most of the coloured prints will be Lori Holt fabric or from other Riley Blake co-ordinating ranges that were part of my stash (and leftover from my Happy Days BOM quilt making).


The low volume backgrounds will all be from stash, though a few are from Lori Holt's collections too. The small piecing makes this quilt a great scrap buster, but there is sometimes the challenge of working out if your scrappy pieces will actually stretch to all the teeny cuts required for each block.  


Speaking of teeny cuts, I avoided some insane ones in this fabulous typewriter block pattern. Lori's instructions are for 32 squares to make up that 4" x 2" keyboard panel.  Yes, 32!!!  Don't forget this block is just 6.5' square as you see it there.  Basically, I couldn't face them, so luckily I had this perfect and amazing typewriter keyboard print (that I am always so afraid to use in case I run out) to use instead.  Job done, and no insane 32 squares.  Hats off to those of you who obeyed the rules on this one.  I'm also rather pleased with the typewritten script fabric I found in my stash  - just the job for the typewriter paper part of this block.

I am very fond of this typewriter block.  When I was a little girl I received a beautiful typewriter as a Christmas present one year and I absolutely loved it!  It was my dream present - always fancied myself becoming writer of some sorts ;-)

So, that's all the blocks now for the first row of my Spelling Bee quilt.  I need to get on now and cut more for row 2!

Saturday 13 July 2019

Hold Everything! Bag - finished


I finally finished my Hold Everything! Bag on Friday night.  I'll be honest and admit to feeling a little battle scarred after this one.  I didn't find the assembling of the individual elements of the bag an easy process, and in many instances am not sure I understood what the result of the written instructions should have been to know what I was aiming for (if that makes sense).  

I realised how spoiled I have been to have been taught by Judith and her fabulous patterns which are so well supported by explanation and photos of many individual stages.  I really could have done with more photos to show how to manoeuvre the bag through the machine and what some of the detail on the finishes was supposed to be.  I guess ultimately, it was just too technical for my abilities but a more experienced bag sewist would probably get on very well with it.


 I've added the scissors and thread for scale here.  As you can see, it's quite a little bag - like a baby sister of the larger A Place for Everything Bag which I know lots of folks have made and loved.


This is the perfect size for what I wanted, but I wonder if its being smaller made it more awkward to work with in the final assembly, or maybe I would have encountered just the same problems with the larger version given my inexperience at this kind of construction and binding.  Who knows?


 Inside, there are vinyl pockets on the inner front and back of the case itself,


and then, four removable pockets attached by velcro.

It should be a handy little project case for EPP and embroidery and associated notions.  I'm just hoping that my dubious worksmanship with hold up over time.


I struggle with bias binding a little even when a project is flat, but it was very challenging for me to manage around the contours of the case.  My bound corners pulled up a little in places and look less nice than they could do.


I also, have puckers around the 'spine' area of the bag binding - I really did struggle working in and out of those corners.


There's also a matter of a raw edge just at the inside of the case zipper tape.  I think perhaps the zips recommended by the pattern have a wider tape than my zips did, and so, if I had used the correct supplies, this particular issue would have been averted and the raw edge enclosed when stitching down the zip edge.

All in all, the case redeems itself by looking pretty in Bonnie and Camille prints, but I am a little disappointed that I was unable to execute better finishes.  Next time, I guess I would know what issues I need to resolve, but truthfully, I never envisage there being a next time for this pattern and me.

You win some, you lose some.


Monday 8 July 2019

Hold Everything! Bag - making a start


I'm having a go at the By Annie Hold Everything! Bag.  I feel a little bit intimidated by it to be honest, but I'm trying to just take it one step at a time and hope that each step makes sense when I get to it.  The pattern is very nicely laid out so you can work step by step and check each off as you complete it.


Of course, I've already deviated a little bit from the exact instructions, but only because I didn't have complete pieces of the fabrics I wanted to use.  (Note - working from stash again - polish that halo!) As a result, rather than stitching up a single piece quilt sandwich and then cutting out the pieces, I had to use several pieces.  It's all fine, except that one of the pocket page pieces that you can see in that little stack of 4 up there was accidentally quilted in a different direction from its buddies.  Oops, pay attention, Sarah!!


The next challenge was to master the art of adding my own zip pulls on the continuous zipper I ordered to avoid having to spend £10 on ordering a 30" zip with head to head zip pulls.  Frugal Quilters Anonymous!  Thank goodness for You Tube and the kind folks who share there.  I had a look at this tutorial and this one and was sorted.  (The second one is a bit long but it was useful for the head to head positioning.)

So, as you can see, I did it, and I saved myself £6.05 in the process, scoring 5m of size 3 continuous zipper with 10 zip pulls for just £3.95 from Zipperstation on Ebay.  Yay!


Moving on to make the pocket pages proved to be a little more problematic for me though.  See above where my four pocket pages appear to be ½" shorter than they should be (the top of my zips do not meet the top of the pocket backing quilt).  Eek!  I felt really disappointed at this point - mainly because it was late at night, and because I was sure I'd cut ever so carefully.  Cue a crisis call for advice from the lovely folks on IG, followed by a week of head scratching and hoping and wishing.


Then, just as I was tidying away before bed on Thursday night, I spotted the cover picture on my pattern and realised that the top of the zipper tape doesn't meet the top of the pocket on the real bag anyway!  Turns out the zip top just gets stitched down and is supposed to sit that ½" lower than the top of the pocket page.  Like this (if you can see it) -


Hmmm.  This was a classic case of me reading pattern instructions with a preconceived idea of what the finish should be, rather than just being obedient to what it said!  However, that said, I am really not fond of that finish and I debated ways to avoid it.  Of course, covering the upper zipper tape would have tidied it up, but with all my shenanigans cutting the piecing for this from various remnants of my B&C fabrics, I didn't have enough of the fabrics left to cover all four of the zipper tapes.


The online pattern page shows another sample bag where the zipper meets the top of the page and is then bound.  This seemed like a better option to me - even if it meant trimming my pockets a wee bit shorter than they should be.


So, I trimmed just ⅛" above the top of the zip tape and stitched the binding to the front of the pocket, turned it over and handstitched to the back.


I'm happy enough with the finish, though I wish I'd trimmed exactly to the top of the zipper tape just to bring the binding down the zipper tape a little.  You live and learn.

While I really can't fault the written instruction of the By Annie pattern, I do wish there were a few more close-up pictures and diagrams to show what it is you are aiming to achieve.  It's not always obvious from the few pictures of the bag provided - at least, not to me.

I'm about halfway through now, and I feel quite anxious about facing the remainder of the construction giving the hiccups I had with the pocket pages.  Just got to keep reminding myself ... one step at a time!


Related Posts Plugin for WordPress, Blogger...