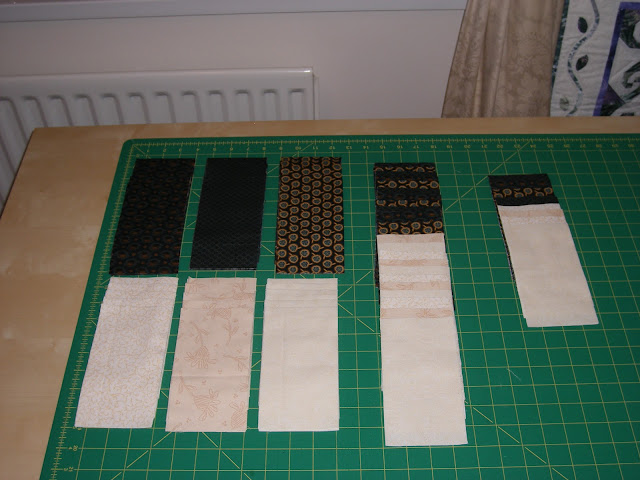
Apologies to my lovely friend Judith, but this mini-distraction from the quilt that I started in a distraction from another quilt is all her fault. (No taking responsibility here for my own aptitude to become distracted - ahem!)
You see, Judith went and posted a fabulous tutorial on a new quilt block for Bee Blessed and I just couldn't wait to have a wee practice. So while I should have been piecing and pressing and squaring off a navy man quilt, here's what I did instead -
Isn't she fun? At one stage in the construction she looked like she had the most amazing afro! I really should have thought to take a pic.
These blocks are going to be great worked into our blessing quilts. If you'd like to make us a wee block for our Bee Blessed projects check out the tutorial and get in touch with Judith or me to let us know you're joining the fun. There is also a flickr page you can check out with some of our past blocks and quilts and where you can join the group.
Saturday, 25 February 2012
Friday, 24 February 2012
Unscheduled Interruption
Although my next plans were to start cutting into these for a quilt
I have interrupted things a little unexpectedly to chop up these instead.
Then once chopped I laid them all out on the bed to get the mix of fabrics right.
Big mistake though! I had to piece like the wind to keep them all in the right rows before I could go to bed! It's not a complex quilt pattern but because I am working with 3 different neutrals and 3 different blues I couldn't touch them until all the rows were pieced correctly. At least it has meant progress, even if it was rather more pressure that I had intended - that'll teach me!
I have interrupted things a little unexpectedly to chop up these instead.
More Indigo Berries - so hard to get good pics of theses deep, rich blues, but they are lovely. |
Then once chopped I laid them all out on the bed to get the mix of fabrics right.
Big mistake though! I had to piece like the wind to keep them all in the right rows before I could go to bed! It's not a complex quilt pattern but because I am working with 3 different neutrals and 3 different blues I couldn't touch them until all the rows were pieced correctly. At least it has meant progress, even if it was rather more pressure that I had intended - that'll teach me!
Thursday, 23 February 2012
My Bling Thing!
Well, I promised you a reveal of my finished jewellery quilt, now affectionately known in this house as the Bling Thing, so here we go.
First of all, I apologise for the terrible picture. The weather is so awful and dull that it has been impossible to get decent light at all, and my close ups of various parts were so bad I had to abandon them, so I'm left with just the one pic to share.
Ta da!
It has all this girl needs to have jewellery on hand when dressing of a morning. Little ribbon tabs hold necklaces and bracelets, there are little popper button tabs for rings, felt for earrings and pockets for odds and ends. I also added a brooch felt at the bottom right so that my brooches are also not languishing in a drawer forgotten in the morning rush!
It was fun to create this one from my head. A little tricky here and there and I've learned some things I could have done better, but it works and does the job and I love the creamy vintage look achieved with the neutral colours and lacey trims. All in all, pleased with my efforts.
Monday, 20 February 2012
Jewellery Quilt Progress
Three or four weeks ago I made a start on a jewellery tidy project. Other commitments and lack of time generally mean that it has looked like this since that time -
Until today, that is. Now it looks like this:
I have high hopes for this little jewellery quilt as a problem solver - keeping my jewellery organised and accessible which means that it should actually get worn more!
This is also the first project that I have used my newly acquired FMQ skills on. I wasn't going to risk it once I'd added all those little fiddly ribbons and popper buttons and lace, but then I figured that I have to have a go sometime. So, have a go I did. There are some truly awful bits, too tight curves and pointy bits, but I did it. I have stippled my very first item! And really, when I get my bling on there who's going to notice but me?
It just needs a little binding and then I'll show you what all those little bits and bobs are intended for.
And, just because I like to show off a bargain, here's my newest little piece of sewing room organisation - ruler storage a la IKEA - plate rack (£1.99).
Almost forgot to tell you that I'm guest posting on Karen's blog today on something totally different. Check out the post here. (There's a wee giveaway too.)
Until today, that is. Now it looks like this:
I have high hopes for this little jewellery quilt as a problem solver - keeping my jewellery organised and accessible which means that it should actually get worn more!
This is also the first project that I have used my newly acquired FMQ skills on. I wasn't going to risk it once I'd added all those little fiddly ribbons and popper buttons and lace, but then I figured that I have to have a go sometime. So, have a go I did. There are some truly awful bits, too tight curves and pointy bits, but I did it. I have stippled my very first item! And really, when I get my bling on there who's going to notice but me?
It just needs a little binding and then I'll show you what all those little bits and bobs are intended for.
And, just because I like to show off a bargain, here's my newest little piece of sewing room organisation - ruler storage a la IKEA - plate rack (£1.99).
I can't really take credit for this idea as I saw it somewhere a very long time ago (just can't remember where), but it is definitely very handy.
Almost forgot to tell you that I'm guest posting on Karen's blog today on something totally different. Check out the post here. (There's a wee giveaway too.)
Sunday, 19 February 2012
Pause for Thought
The prayer of St Theresa
May today there be peace within.
May you trust God that you are exactly where you
are meant to be.
May you not forget the infinite
possibilities that are born of faith.
May you use those gifts that you have received,
and pass on the love that has been given to you.
May you be content knowing you are a child of God.
Let this presence settle into your bones,
and allow your soul the freedom to sing,
dance, praise and love.
It is there for each and every one of us.
Friday, 17 February 2012
Bee Sampler Blocks
In anticipation of our bright sampler quilt at Bee Blessed I've been having fun trying out a few blocks -
And, just to let you see my finished Welcome Wallhanging from class, here's a couple of pic -
just need to invest in a decent hanger for it and get it on the wall permanently.
This is an upscaled version of the Streak of Lightning block from the Farmer's Wife sampler. |
And this one was just me having a play with my teeny Soul Blossom leftovers. |
And, just to let you see my finished Welcome Wallhanging from class, here's a couple of pic -
Close up of my fimo buttons - made 'em myself! |
just need to invest in a decent hanger for it and get it on the wall permanently.
Saturday, 11 February 2012
Self -Indulgence Saturday!
Headed out this morning in search of terracotta and soft buttermilk fabrics -
No, there's nothing wrong with your colour contrast, these are pinker than pink pinks! It's a long story, and I won't bore you, but they will be for a future quilt project. (Pinks by request, terracotta option abandoned.)
And after a morning's fabric browsing, I now have the house to myself for a whole afternoon and evening! So these are now my plan for these rest of today...
And, there may well be some of this too ...
Hope you have time to be a little self-indulgent today too!
And after a morning's fabric browsing, I now have the house to myself for a whole afternoon and evening! So these are now my plan for these rest of today...
Can't tell you how excited I am to be able to choose a movie I'd like to see and to not have to watch Harry Hill tonight! |
Yup, that's a big spoon! and only one of them! |
Hope you have time to be a little self-indulgent today too!
Wednesday, 8 February 2012
Mouthy Stitches Swap Pouch
Here it is folks, one zippered pouch for my partner in the Mouthy Stitches Pouch Swap. Ta da!
As I researched/stalked my partner for inspiration I had an idea to take her love of whimsy and work that through 'my way'. In other words, when you have no 'whimsy' in your fabric stash, you need to create the whimsy yourself. Hence the embroidery stitching. Thanks to Aimee Ray's Doodle Stitching book my partner is getting mushrooms, a gnome and a hedgehog that are recognisable as such!
Although the current trend seems to be for bright fabric panels or blocks on linen backgrounds, I wanted to switch that around a little. So this pouch has bright fabric background (including a few little co-ordinating pleats) with the linen as the focus panel. I know from the comments on the flickr group that a few folks would have preferred to keep the linen as the main fabric but if I had tried that then my little stitcheries wouldn't really have worked. So I hope it was a gamble worth taking (and I haven't ignored anything my partner said to just do my own thing, just in case she's reading and is worried).
I wanted the back to be fun too, so stitched up a wee birdie family to perch there. Then, because my partner said she might like one, I added a wristlet strap too. This one's removable so if she changes her mind she can just unclip it.
The little internal pocket is there just in case my partner needs a chocolate hiding place! (Who doesn't?) The final pouch measures approx 9.5" x 8.5" so it's reasonably roomy and could be used for any number of purposes (lots of chocolate?).
It was great to have a partner who participated and shared her thoughts and opinions so frequently through the swap discussions and photo comments, and hopefully that has resulted in making her something that she truly will like. So there it is Partner, your Mouthy Stitches Swap Pouch complete with zip and this fq's worth of scraps tucked inside.
Now, are you wondering whose address gets to go on the envelope on 25th? ......
Pouch front |
Tricky to get a pic of those wee pleats - hope you get the idea. |
Pouch back |
I wanted the back to be fun too, so stitched up a wee birdie family to perch there. Then, because my partner said she might like one, I added a wristlet strap too. This one's removable so if she changes her mind she can just unclip it.
One zip as per swap requirements. |
The little internal pocket is there just in case my partner needs a chocolate hiding place! (Who doesn't?) The final pouch measures approx 9.5" x 8.5" so it's reasonably roomy and could be used for any number of purposes (lots of chocolate?).
It was great to have a partner who participated and shared her thoughts and opinions so frequently through the swap discussions and photo comments, and hopefully that has resulted in making her something that she truly will like. So there it is Partner, your Mouthy Stitches Swap Pouch complete with zip and this fq's worth of scraps tucked inside.
I promise the scrap colours are better in reality! |
Now, are you wondering whose address gets to go on the envelope on 25th? ......
Tuesday, 7 February 2012
Fairytale Stitching
The Mouthy Partner Pouch Swap flickr page is awash with pics of amazing practice pouches (practice my eye!), fabric selections and some finished pouches! You should hop over there and have a peek at the amazing work going on. The standard has been set very high by these lovely swappers!
Anyway, all those pics serve to remind me that I too have a pouch to produce for my partner. I've been picking out fabric options, deciding on the design (with a little help from comments on the flickr group) and now actually trying to get the design from my head into fabric. And all this while worrying whether I'm on the right track with my choice of embroidery panels.
My partner describes herself as fun and a lover of whimsy so I'm hoping that these will appeal to her, even if the fairytale-esque designs leave me wondering whether I'm doing the right thing. Not my normal choice of design but then this pouch isn't for me and I really want her to have something she can enjoy. Fingers crossed!
Now to turn these wee scraps of embroidered linen into a respectable zippered pouch!
Sunday, 5 February 2012
Welcome Progress
I didn't make it to therapy class this week so I've been playing catch up at home so as not to fall behind with my Welcome banner. Having happily cut and stuck all the wee pieces in place last week, this week it was time to put all the sketching practice to work.
So it was in with the bright contrasting threads, down with the feed dogs, deep breath in and time to get sketchy around those letters and bunting.
If this were a school report it would say "could do better" but it might also say "could do worse". It could definitely stand some improvement but it's not so bad I'll need to relegate it to a drawer somewhere. Relief!
If you fancy a go at this wee banner yourself, the lovely Judith has recently opened an Etsy Shop to sell her patterns and this is one of the ones in there - go have a look!
So it was in with the bright contrasting threads, down with the feed dogs, deep breath in and time to get sketchy around those letters and bunting.
Was very difficult to get a decent photo but hopefully you get the idea - a few of my sketchy wobbles were a bit too generous, but hey ho ... |
Random pic from the back |
If this were a school report it would say "could do better" but it might also say "could do worse". It could definitely stand some improvement but it's not so bad I'll need to relegate it to a drawer somewhere. Relief!
If you fancy a go at this wee banner yourself, the lovely Judith has recently opened an Etsy Shop to sell her patterns and this is one of the ones in there - go have a look!
Wednesday, 1 February 2012
"Sweetest Sixteen" Quilt Finished!
Subscribe to:
Posts (Atom)