If you've checked in to find a tutorial on puckering up - I'm sorry to disappoint! That's a whole other blogsite! It's just a block tute I'm afraid, and I've called it the Great Big Kiss block because this block just reminds me of the big XXs that we add to the bottom of our greetings cards.
If you know the real name of this block, could you please share it with me? It reminds me of a bow tie variation, but I cannot find the pattern in any of my books or online resources and I know I first saw a picture of blocks like this on a blog somewhere about 18mths ago but cannot remember where.
Anyway, as some of you may remember I made up loads of these blocks for this quilt which I made my son last Christmas. This was such a simple but fun block and so I thought I'd write up a wee tutorial so I don't forget how I made them. Thought some of you might be interested in it too. So, with apologies for some of the pics being a little out of focus, here goes:
Cut 4: 4.5" squares solid fabric
Cut 5: 4.5" squares patterned fabric
Cut 8: 2" squares patterned fabric
Use scant 0.25" seams throughout.
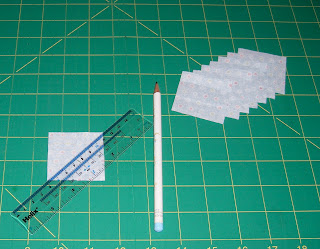
1. Take all 8 of your 2" squares and draw a diagonal line across the wrong side of the fabric. This will be your stitching line. Top tip: as the fabric can shift under the pull of the pencil, I start my line from the centre of the square and draw out to one corner and then go back to the centre and draw the other half of the line out to the other corner - it really does help. Please note that for directional fabric it will matter which way you draw the diagonal, so you may need to figure out which way that needs to happen first.
 |
| The square on the right is positioned correctly with the diagonal cutting across the corner, not through it like the one on the left. |
Stitch on the diagonal line. Trim off the corner 0.25" from the stitching line and press seam open towards the patterned fabric.
3. On the same solid square repeat step 2 adding another corner adjacent to the first.
4. Repeat steps 2 and 3 for the remaining 3 solid squares. You now have four white squares with little patterned corners.
5. Now you have 9 4.5" squares ready to be stitched together in the usual nine-patch way. Lay out your 9 patches as shown below.
6. Sew the blocks into rows, pressing the seams of the top and bottom rows towards the patterned outer squares and the seams of the middle row towards the patterned centre square.
7. Placing rows 1 and 2 right sides together, butt the seams and pin in place to hold while you stitch the row together. Repeat to join rows 2 and 3.
8. Now press the seams of the fully joined rows open to give you a nice flatter finish.
9. Trim your block to 12.5" square and smile at the Great Big Kiss you just made!
Hope it works for you!


Great tute! It does look like a bowtie variation. I will definitely try this out once we've moved :)
ReplyDeleteWhat a great block and thanks for the tute
ReplyDeleteLove these blocks on the grey background. Definitely a potential BB block. Jxo
ReplyDeleteHave done the bow tie block, but this is lovely. Love the colours you used. My thoughts exactly Judith, it would make a great BB block/quilt.
ReplyDeleteMwah! Love it. Thanks for showing us all how to make fabric kisses! Di x
ReplyDeleteThanks for sharing - this looks like a great block!
ReplyDeleteGreat tutorial, Sarah, and love the block! Would make a great baby quilt.... ;)
ReplyDeleteThanks Sarah, easy looking block, but how good does it look in your quilt.
ReplyDelete